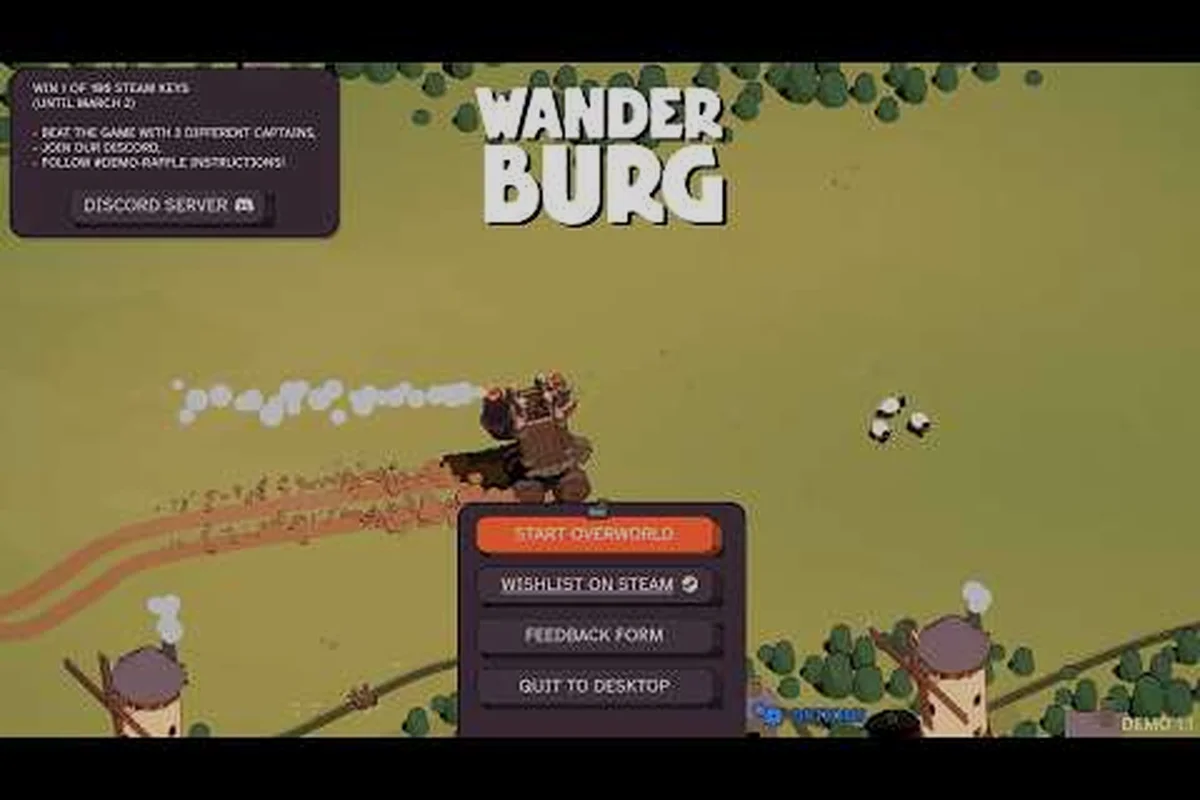
Learning how to explore in Wanderburg efficiently is the difference between a stalled early run and a fortress that snowballs into the late game. Because the map is procedurally generated and your moving castle grows with every village you devour, mastering wanderburg how to explore routes determines how fast your modules, artifacts, and captain roster expand. This guide covers biome progression, the full ladder of difficulty levels, and practical map-reading habits so every run pushes you deeper than the last.
The core loop on the official Wanderburg website describes the game as a "minimalist open-world roguelike in an ecosystem of Castles on Wheels" where players "consume, grow bigger, upgrade modules, and survive." Exploring well is what unlocks that growth — it is the single highest-leverage skill in the entire game.
Understanding Wanderburg Biome Progression
Wanderburg's world is divided into distinct biomes that act as difficulty tiers. Each biome introduces new enemies, terrain hazards, and resources, and reaching a new biome usually means your previous build is about to be stress-tested. The biomes follow a rough east-to-west or low-to-high altitude curve, though the procedural map can scramble the order between runs. According to the Wanderburg Steam page, players are "rolling through different biomes across multiple difficulty levels," which confirms that biome traversal is the primary progression axis.
| Biome Tier | Approximate Altitude / Position | New Enemies & Hazards | Key Resources & Modules Unlocked |
|---|---|---|---|
| 1 — Starter Plains | Low altitude, eastern edge of map | Foot soldiers, light wooden barricades | Basic wooden castle chassis, melee modules |
| 2 — Rolling Hills | Low–mid altitude | Archer outposts, rolling terrain slows movement | Iron plating tier 1, ballista module |
| 3 — Forest Verge | Mid altitude, denser foliage | Ambush archers, tree-chokepoint hazards | Siege ram module, increased storage capacity |
| 4 — Mountain Pass | High altitude, narrow corridors | Rockfall hazards, fortified gatehouses | Heavy iron plating, catapult module, artifact slot 1 |
| 5 — Volcanic Ridge | Highest altitude, western edge | Lava tiles, elite captains, explosive barrels | Reinforced hull, flame module, artifact slot 2 |
| 6 — Wasteland Frontier (post-game) | Procedurally scrambled, mixed altitudes | Mixed biome enemy rosters, weather hazards | All experimental modules, captain-only upgrades |
Biome Order and Unlock Conditions
The biome ladder typically starts with a temperate green region (the easiest starting zone), then escalates into a forest band, a rocky highlands zone, a desert stretch, and finally a frozen or volcanic endgame biome. You do not unlock biomes through a quest — you unlock them by surviving long enough to drive into them. The map edges function as soft gates, with higher-tier enemies patrolling the borders.
| Biome Tier | Typical Enemies | Resource Focus | Recommended Castle Size |
|---|---|---|---|
| Greenfields (starter) | Light militia, basic towers | Wood, scrap iron, common modules | Small (1-2 modules) |
| Whispering Forest | Ambush archers, rolling logs | Herbs, dense wood, rare bolts | Medium (3-4 modules) |
| Stonebreak Highlands | Heavy pikemen, ballista nests | Stone, iron, siege blueprints | Medium-large (4-5 modules) |
| Scorched Desert | Sand worms, fast cavalry, heat mirages | Sand-forged metal, glass, oil | Large (5-6 modules) |
| Frostpeak Caldera | Ice titans, lava vents, fortress bosses | Crystals, rare artifacts, master blueprints | Maximum (6+ modules) |
Reading the Map While Rolling
Because your castle is always moving, the map screen becomes your most important tool. Look for three signals before committing to a direction: enemy density clusters (denser red dots mean a fortress or mini-boss), resource node colors (each biome tints its harvestable nodes differently), and the faint outline of the next biome band on the horizon. The map edges fog out gradually, so pushing the fog line is a reliable way to scout ahead without taking fights.
For a complete reference of every biome and what they each drop, the Wanderburg biome list breaks down region-specific loot tables and enemy behaviors in more detail.
When to Push Forward vs. When to Farm
A common mistake is rushing into the next biome tier before your castle has the module count to survive the jump. Use the rule of thirds: spend roughly one-third of your time gathering in the current biome, one-third pushing the border, and one-third engaging the highest-value targets you can find. If you cannot clear the strongest enemy patrol in your current biome within two attempts, you are under-leveled for the next band.
Wanderburg Difficulty Levels Explained
Wanderburg ships with several stacked difficulty layers, and learning how to read them is essential for both new players and veterans chasing the wanderburg hardest difficulty achievement. The system blends a global run difficulty (chosen at the start) with a per-biome intensity that scales as you push deeper.
Global Difficulty Settings
The main menu offers a choice that affects every aspect of the run: enemy damage, resource spawn rates, and the speed at which hostile patrols upgrade. Lower settings give newer players room to learn the consumption-and-growth loop, while the hardest setting strips away safety nets and demands near-perfect route planning.
| Difficulty | Enemy Damage | Resource Density | Patrol Upgrade Speed | Best For |
|---|---|---|---|---|
| Pilgrim | 0.7x | 1.4x | Slow | First-time players |
| Settler | 0.85x | 1.2x | Normal | Learning biome routes |
| Warlord | 1.0x | 1.0x | Normal | Standard experienced runs |
| Conqueror | 1.25x | 0.85x | Fast | Optimized builds only |
| Cataclysm | 1.5x | 0.7x | Very fast | Challenge and leaderboard runs |
Per-Biome Intensity Scaling
Even within a single run, each biome behaves harder the longer you stay in it. A timer-like mechanic increases patrol density and elite spawn chance the longer your castle lingers. This is why the meta-strategy is to keep moving — harvesting on the go rather than camping a single rich node. Players who understand this loop climb through the Wanderburg progression guide content quickly because they avoid the soft "farming trap" that wastes runs.
How to Change Difficulty in Wanderburg
If you are wondering wanderburg how to change difficulty mid-run, the short answer is: you cannot. Difficulty is locked at run start. However, you can adjust related settings from the pause menu at any time. Controller bindings, graphics options, and accessibility toggles are all available between biomes, but combat difficulty remains fixed so the run stays fair for leaderboard purposes.
To reset your difficulty for a new run, simply return to the main menu and start a fresh expedition. Your previous run's unlocks (captains, artifacts, vehicle chassis) carry over regardless of the difficulty you choose, so experimenting with harder settings does not cost you long-term progress.
Building a Map Progression Strategy
Map progression in Wanderburg is not about finding the exit — it is about choosing the most efficient path through a procedural landscape. The best routes share three traits: they chain high-value resource nodes, they avoid elite patrols until your castle can handle them, and they trend toward the next biome border at a sustainable pace.
Step-by-Step Exploration Plan
-
Start slow in Greenfields — clear 3-4 small villages to bank module parts before pushing east.
-
Identify the forest border on the map — the color shift from green to deep teal is your visual cue.
-
Time your border crossing — enter a new biome during a calm patrol window, not during an elite spawn.
-
Chain resource nodes along the new biome's edge — the border zones always have richer drops than the deep interior.
-
Push to the next biome every 8-12 minutes of real-time play — staying longer accelerates the difficulty ramp.
Route Optimization Tips
The most efficient routes follow a wide clockwise or counter-clockwise arc rather than cutting straight across. Because the procedural generator seeds enemy patrols in clusters, a curved path naturally avoids the densest red zones while still hitting the most nodes. This is one reason Dabble's moving castle build demonstrates such a high clear rate — the route planning is as important as the module loadout.
When you spot a fortress icon on the map, treat it as a calculated risk rather than an automatic target. Fortesses offer massive module rewards but trigger a wave defense event. If your castle is below 4 modules, the risk outweighs the reward. Save fortress assaults for the mid-to-late game when you have a full siege loadout.
Hardest Difficulty Survival Guide
Clearing the game on the wanderburg hardest difficulty (Cataclysm) requires combining every lesson above into a single disciplined run. Community reports from players on YouTube and the developer Discord describe Cataclysm runs as "brutal but fair" — the game does not cheat, but it punishes every misstep.
Cataclysm-Specific Adjustments
On Cataclysm, resource density drops to 70% of Pilgrim, so every node you skip is a module you will not have later. The patrol upgrade speed also doubles, meaning an enemy you can handle in minute 5 becomes a serious threat by minute 10. To survive, you need to compress your early game: reach 3 modules within the first 5 minutes, and 5 modules within 12 minutes. This is the benchmark that Gohjoe's unstoppable fortress run hits consistently.
Recommended Captain and Module Picks
Cataclysm demands a defensive captain with strong sustain talents. Pair that captain with at least one ranged siege module and one area-of-effect module so you can clear ambushes before they snowball. Avoid glass-cannon builds — the increased enemy damage multiplier means a single mistake costs you the run. For captain-specific advice, the Wanderburg captain progression guide explains which unlock order works best for high-difficulty runs.
Vehicle and Artifact Synergies
Your vehicle chassis matters more on harder difficulties. Heavier chassis absorb more hits but move slower, which can be a problem when patrol density spikes. The Wanderburg vehicle health and armor guide recommends a mid-weight chassis for Cataclysm, paired with an artifact loadout that boosts module repair speed. Artifacts that grant shield regeneration or reduce incoming damage are far more valuable than raw damage artifacts at this tier.
For artifact combinations that synergize with high-difficulty exploration, the Wanderburg artifact combination guide details which pairings extend your castle's effective HP pool the most.
Advanced Exploration Tactics
Once the basics are second nature, the next step is squeezing every last percent of efficiency out of your run. Advanced players treat the map like a puzzle: each biome border is a timing window, each resource node is a future module, and each elite patrol is a risk-versus-reward calculation.
Fog-of-War Scouting
Push the fog line aggressively in safe directions. Scouting does not cost resources and reveals patrol patterns for several minutes. Use the gap between clearing a village and the next patrol refresh to scout one screen-width ahead. This is the single cheapest source of map intelligence available.
Elite Patrol Baiting
Sometimes the best move is to draw an elite patrol away from your intended route. Lure it toward an empty section of the map, then loop back once it has settled. This is a niche trick, but on Cataclysm it is the difference between a clean run and a wipe at minute 15.
Run-Length Targets
Set personal targets based on biome count, not time. Aiming for "clear 4 biomes per run" is more measurable than "survive 20 minutes" because the procedural map can vary run length. Players who hit 4 biomes consistently tend to clear Cataclysm within a few attempts.
Closing the Run
Your final push should be the most disciplined section of the run. By the time you reach the hardest biome, your castle should be at maximum module count, your captain should be near max level, and your artifact loadout should be fully combined. Do not get greedy — extract when your objectives are met rather than chasing one more fortress. A clean extraction with 6 modules and a strong captain always beats a lost run chasing 8 modules.
Frequently Asked Questions
What is the fastest way to learn how to explore in Wanderburg?
Start on Pilgrim difficulty, clear 3-4 villages in Greenfields, then push east toward the forest border. Focus on map awareness rather than combat optimization — understanding patrol patterns and resource node locations is the foundation of every successful run. Within 5-10 runs, you will internalize the rhythm.
How do I unlock the harder difficulty levels?
You unlock the higher difficulty tiers (Conqueror and Cataclysm) by completing at least one full run on the tier below. A "full run" means reaching the final biome and extracting, not just surviving for a time threshold. Each successful extraction unlocks the next tier in the menu.
Can I switch from mouse to controller mid-run?
Yes, input devices can be swapped at any time from the pause menu without ending your run. The game supports seamless transitions between mouse, keyboard, and controller, which is especially useful for long expeditions. The full list of supported bindings is covered in the controller support guide.
Does the hardest difficulty affect drop rates?
Yes, Cataclysm reduces overall resource density to 70% of Pilgrim, but it increases the quality ceiling of drops. You will find fewer common modules, but rare and master-tier blueprints appear more often. This trade-off rewards skilled players who can extract value from sparse runs.
What is the best biome to farm modules?
The Stonebreak Highlands biome offers the best module-to-time ratio for mid-game players. It has high iron and blueprint density, predictable patrol patterns, and sits between two easier biomes that you can retreat to if overwhelmed. Desert and Frostpeak have better endgame loot, but their patrol density makes them inefficient for raw module farming.