Most Wanderburg runs don't die in the late game. They die in minute three, when a freshly rolled castle meets a fortress full of archers and a boss the player didn't know was scripted. A solid Wanderburg run guide is less about memorizing combos and more about shaping your first ten minutes so the snowball never breaks, which is why this walkthrough focuses on practical momentum: keyboard layout, module choices, and the small beginner mistakes that quietly kill promising runs.
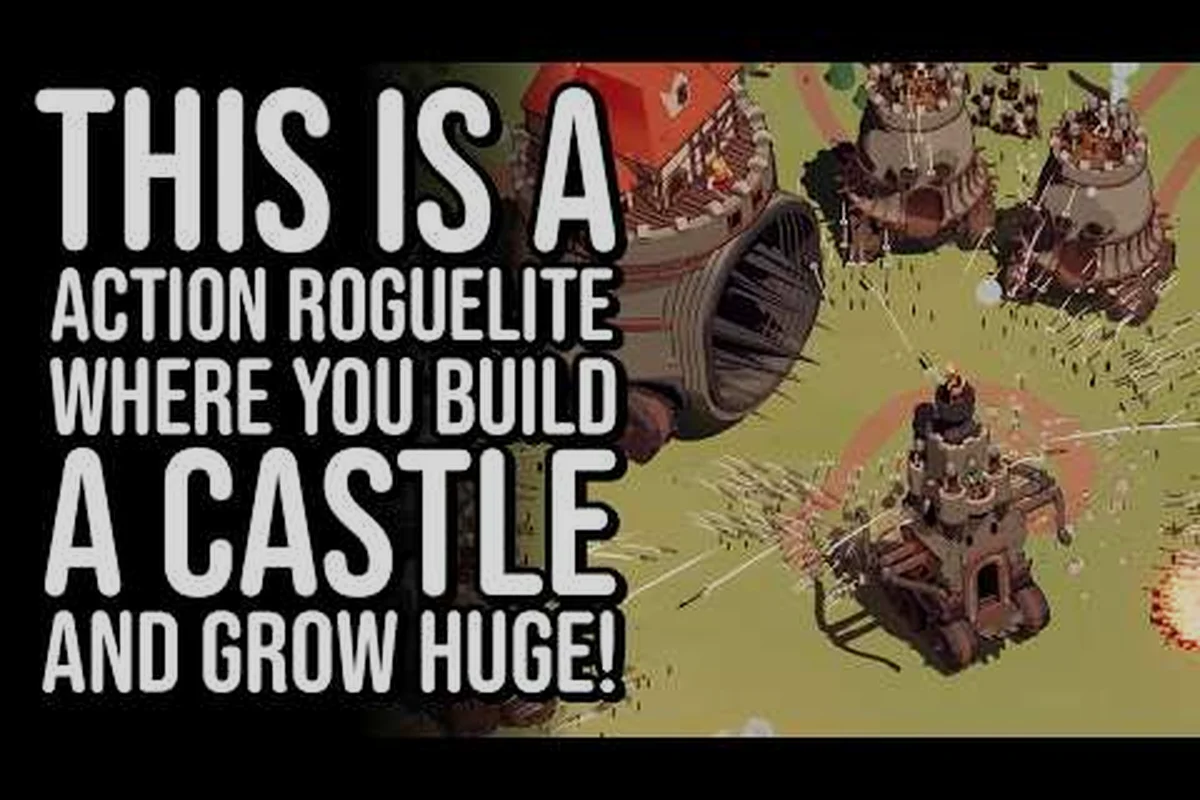
Wanderburg is a minimalist open-world roguelike built around castles on wheels. You roll across procedurally generated biomes, devour villages, and stack modular siege weapons onto your moving fortress while hostile keeps try to stop you. Every fortress you crush, every artifact you slot, and every captain you unlock carries into the next run, so a smart early-game plan compounds fast — and a sloppy one snowballs in the wrong direction.
Wanderburg Keyboard Controls and Core Movement
The fastest way to flatten your first hour in Wanderburg is to bind the controls to muscle memory before the first fortress shows up on the horizon. According to the official Steam page, Wanderburg is fully playable with mouse, keyboard, or controller, but the keyboard setup gives new players the most precise control over module targeting and rolling momentum.
Default Keyboard Layout
| Key | Action |
|---|---|
| W / A / S / D | Roll your castle forward, left, back, and right |
| Left Mouse Button | Aim and fire the active primary module |
| Right Mouse Button | Aim and fire the active secondary module |
| Space | Handbrake / quick stop |
| Shift | Boost roll speed (drains stamina) |
| E | Interact / devour a destroyed village |
| Tab | Open module, artifact, and captain loadout |
| R | Reload active module (ballistae, catapults) |
| 1-4 | Swap between equipped module slots |
| Q | Drop a placed structure (spikes, barricades) |
| Esc | Pause and bring up the run menu |
That layout matches what the developer team at Randwerk shipped in the Early Access build launching September 8, 2026. Players who remap the rolling keys to the arrow keys report feeling more precise on tight turns, but the WASD cluster is closer to the module hotbar and reduces thumb travel during combat.
Stamina, Boost, and Handbrake Discipline
Your castle has a stamina bar that powers boosts, emergency turns, and handbrake pivots. Once that bar is empty, you crawl, you can't escape a charging ram, and any boss with closing speed will pin you in place. Treat stamina like a health pot: spend it on the first shot of an engagement, then spend the next few seconds rolling passively while the bar refills. Boosting into a fortress without a stamina reserve is one of the most common beginner mistakes in any Wanderburg strategy guide, because it leaves zero room to dodge the counter-fire that follows your volley.
Picking Your First Modules in a Wanderburg Run
Module choice is where most runs either snowball or stall. Your castle can carry several modules at once, but only the active two in slots one and two fire on left and right click. Every other module contributes passive bonuses or triggers on contact. Players who want a smooth first run should treat module picks as a tempo question, not a damage question.
Early-Game Module Tiers
| Module | Role | When to Install |
|---|---|---|
| Wooden Ram | Melee, breaks fortification gates | Start of every run |
| Ballista | Single-target pierce, high range | Replace ram after first fortress |
| Catapult | AoE siege, slows grouped defenders | Pick up at the second biome |
| Spike Strip | Passive contact damage, slows pursuers | Drop during boss kiting |
| Fire Pot Launcher | Burn damage over time, melts shield walls | Biomes 2-3 transition |
| Healing Sigil | Restores hull integrity when standing near it | Defensive players, act 2 |
The Wooden Ram is the safest opener because it one-shots gates and gives you castle health on contact. Replace it with a Ballista the moment you unlock a second module slot, because ranged fire lets you engage without trading hull damage. The Catapult looks powerful on paper, but its arc is steep and its reload is long — new players who pick it up first usually overshoot small forts and waste shots.
For a deeper breakdown of how each module interacts with captain abilities, the Wanderburg beginner build guide walks through specific loadouts that pair well with the default captain, including how pairing a Catapult with the Vanguard captain's siege aura boosts grouped-defender slows by roughly 25% and why a Healing Sigil on act 2 maps offsets the hull damage you trade for early Catapult misfires.
Module Placement Matters More Than Module Power
Two castles with identical modules can perform very differently because the placement order changes the firing arc. Modules mounted on the front corners fire first, which is great for opening volleys but exposes them to counter-fire. Modules mounted on the rear corners stay safe longer and let you kite boss fortresses around the map. The standard opener is one front-corner Ballista for pressure, one rear-corner Catapult for area denial, and the Wooden Ram centered up front to crack gates on contact.
Wanderburg Beginner Mistakes That End Runs Early
The same three or four mistakes show up in roughly every "I lost at minute eight" thread, so it pays to know them in advance. Building a Wanderburg strategy guide around avoiding these pitfalls tends to produce longer runs than chasing perfect module rolls.
Overextending Into the Second Biome
The map rolls you gently from one biome to the next, and the temptation to chase the next fortress on the horizon is real. The mistake is leaving a biome before you've cleared at least three of its fortresses, because each cleared fortress is a guaranteed module or artifact drop. A clean biome also unlocks a checkpoint caravan that lets you fast-forward back if a run later collapses. Players who sprint straight to the second biome often reach it under-leveled and run into a boss they weren't ready for.
Ignoring Artifacts in Favor of Raw Damage
Artifacts are passive equip slots that buff your castle, your modules, or your captain. They look small in tooltips, but stacked correctly they multiply your damage and survivability. The single biggest Wanderburg beginner mistake is skipping the artifact pedestal in destroyed villages because the popup feels like a distraction. Every artifact is permanent across runs once unlocked, and even a "+6% hull" charm compounds into thousands of extra hit points across a long run.
If you want a full breakdown of slot order, drop tables, and which artifacts to prioritize, the Wanderburg artifact guide covers the current Early Access loot pool. Pay special attention to the order in which the Captain's four artifact slots unlock — most runs stumble by over-investing in castle-only charms during the first two sectors, when a balanced split between hull, module crit, and captain haste relics delivers far better late-game scaling against Act 3 siege waves.
Fighting Bosses on the Open Map Instead of Near Cover
Boss fortresses in Wanderburg have scripted attack patterns: volleys of boulders, rotating shield walls, and rams that charge once you've damaged them past a threshold. Fighting them in the open means every shot lands cleanly on your hull. Fighting them near a forest edge or rock formation means the geometry eats half their projectiles for free. The community calls this "kiting under cover," and it's the cleanest way to turn a fair fight into a winning one.
Things to Know Before Playing Wanderburg
There are a handful of things to know before playing Wanderburg that aren't obvious from the first ten minutes, and most of them save you from wiping on a run you were clearly winning — things like properly managing your Wanderburg stamina meter, learning the shop economy timing windows, and avoiding the most common beginner mistakes that cost experienced players their perfect runs.
Permanent Progression: Failed Runs Still Count
Every fortress you destroy, every artifact you unlock, and every captain you recruit stays in your account. Even a failed run is a real progression run, because you'll come back with one more module unlocked and one more artifact option. This is the single most important thing to internalize for new players: a wipe at minute twelve is still a net win if it taught you a boss pattern and added a new module to your permanent pool.
The Captain Roster Is a Multiplier, Not a Crutch
Captains are unlockable characters with their own passive trees, and switching captain mid-run is allowed at any checkpoint caravan. New players often fixate on the starting captain and never swap, but the captain system is designed around swapping to counter the current biome. A captain with ram damage bonuses shines in biomes full of wooden forts; a captain with artifact effect bonuses shines in biomes full of shielded keeps. Swapping at the right checkpoint is one of the highest-impact habits in any Wanderburg strategy guide.
Difficulty Scales With Castle Size, Not Just Time
A common surprise for new players is that the difficulty meter doesn't tick from a clock — it ticks from how many fortresses you've destroyed. A run that clears four fortresses in eight minutes is harder than a run that cleared one fortress in eight minutes, because the map has scaled to your threat level. The trick is to pace your clears: clear enough to keep the snowball rolling, then spend a few minutes farming villages for artifacts and hull repair before pushing into the next difficulty bracket.
Smart Module Picks and Captain Synergies
A Wanderburg run guide isn't complete without named builds new players can copy and adapt, so the three loadouts below outline a Frontline Vanguard (Shield Wall + Rallying Strike for first-floor sustain), a Backline Arbalist (Crossbow Turret + Volley for ranged DPS), and a Hybrid Engineer (Trap Layer + Repair Drone, the safest pre-Captain-3 setup). Each is tuned for the Early Access launch meta, requires only the starting captain to execute, and plugs into the Smart Module picks covered above without conflicting captain synergies.
Build A — The Pressure Ram
| Slot | Pick | Reason |
|---|---|---|
| Front | Wooden Ram | Fastest gate break in the game |
| Front Corner | Ballista | Pressure while ramming |
| Rear Corner | Spike Strip | Punish pursuers when kiting away |
| Artifact Priority | Hull % | Tank the counter-volley |
This build trades module flexibility for raw tempo. The goal is to close distance, crack the gate, and roll over the fortification before the defenders can rotate their shields. It works best in biomes 1-2 where gates are wooden and rams still one-shot them.
Build B — The Kiting Sniper
| Slot | Pick | Reason |
|---|---|---|
| Rear Corner | Ballista | Long-range single target |
| Rear Corner | Catapult | AoE for grouped defenders |
| Passive | Spike Strip | Punish the ram that closes distance |
| Artifact Priority | Reload speed | More shots, faster clear |
This loadout is slower but more forgiving. You roll backward into a firing position, let the Ballista volley, then reposition before the catapult re-arms. It's the safest build for a first boss attempt because you can stay near cover almost the entire fight.
For a full look at how captain passives change the math on these builds, the Wanderburg captain guide maps each captain's signature perk against the modules that trigger it — for Build B specifically, pairing a Ballista/Catapult rear with Spike Strip passive scales hardest with captains whose passives boost projectile crit chance or ram-contact damage, since the kiting loop already front-loads single-target burst and only needs a defensive edge to punish over-extending siege weapons.
Build C — The Artifact Engine
| Slot | Pick | Reason |
|---|---|---|
| Front | Wooden Ram | Reliable opener |
| Rear Corner | Healing Sigil | Sustain during long boss fights |
| Passive | Spike Strip | Extra contact damage on retreat |
| Artifact Priority | Effect intensity % | Multiplies sigil, charm, and amulet effects |
This is the late-game build that veteran streamers showcase on YouTube. The Healing Sigil feels weak on its own, but stacked with "+effect intensity" artifacts it becomes a permanent hull regen aura. The build asks you to play patiently and let the artifacts do the work, which is the opposite of the pressure-ram playstyle but scales better into the harder biomes.
How to Read the Map in a Wanderburg Strategy Guide Context
The map is a tactical tool, not a navigation tool, and every Wanderburg strategy guide treats it as the single most important planning screen you'll touch between biomes. Each icon encodes multiple variables at once: biome risk tier, expected enemy density, merchant presence, hazard tiles, and the safest transition node into the next region, so an experienced reader can plot two or three future biomes ahead just by scanning symbol color and shape. Learning this icon language is what separates a clean Wanderburg run guide execution from a chaotic one, because misreading a single caution marker can route you into a biome you're under-equipped for, forcing a retreat that burns consumables and key cooldowns.
Map Icon Meanings
| Icon | Meaning | Recommended Action |
|---|---|---|
| Cluster of red flags | A fortress with multiple defenders | Approach with full stamina and both modules ready |
| Single red flag | A small village or outpost | Safe to clear for module drops and artifact chances |
| Gold banner | A boss-tier fortress | Clear two nearby villages first to top off modules |
| Blue wagon | A checkpoint caravan | Use to swap captain and refill healing items |
| Skulls | Sites of previous failed runs | Sometimes drop bonus loot on revisit |
| Wavy lines | Biome transition | Slow down and check module loadout before crossing |
Reading the map in clusters rather than point-to-point is the easiest habit to build. A fortress near a checkpoint caravan is the safest first clear, because you can refill and swap captain before moving on. A fortress in the middle of an open field is a kiting fight, not a charging fight. Players who chase the closest red flag without checking the surrounding icons are the ones who walk into a boss they weren't ready for.
When to Push, When to Reset
The reset option in the pause menu returns you to the start of the current biome with all your unlocks intact. It's tempting to use reset as a panic button, but it has a 60-second cooldown and only saves the current biome's progress. The real reset habit is to push aggressively until you've cleared two or three fortresses, then pause and let difficulty recalibrate. A clean reset is worth more than a messy fourth fortress.
Frequently Asked Questions
What are the most important Wanderburg keyboard controls for new players?
The four most important Wanderburg keyboard controls are WASD for rolling, left and right mouse for module firing, Space for handbrake, and Tab for the loadout screen. Bind those five before anything else, because they cover movement, combat, and module swaps in every fight. Once those are in muscle memory, the 1-4 hotbar keys and Shift boost become easy to layer on top.
What beginner mistakes should I avoid in my first Wanderburg run?
The biggest Wanderburg beginner mistakes are sprinting into the second biome before clearing three local fortresses, ignoring artifact pickups in villages, and fighting bosses on open ground instead of near cover. Each of these silently turns a winnable run into a wipe around minute eight. Slow down, clear your current biome, and treat every artifact pedestal as a free win.
What should I know before playing Wanderburg for the first time?
The most important things to know before playing Wanderburg are that progression is permanent across runs, captains can be swapped at checkpoint caravans, and difficulty scales with how many fortresses you've cleared rather than time on the clock. A wipe is still a real progression run, so don't feel punished for losing. Treat each run as a chance to unlock one more module or artifact.
How do I choose modules in a Wanderburg strategy guide context?
In a Wanderburg strategy guide context, module choice is about tempo more than damage. Start every run with the Wooden Ram, swap to a Ballista after the first fortress, and pick up a Catapult at the second biome. Always place your active modules on the rear corners if you plan to kite bosses, and keep at least one defensive passive like Spike Strip mounted for emergency contact damage.
Where can I watch high-skill Wanderburg runs to learn advanced plays?
YouTube is the best place to watch high-skill Wanderburg runs, with creators like Gohjoe and Flambass publishing full Early Access gameplay that breaks down module stacking, captain swaps, and boss kiting. Watching a five-minute clip of how a streamer positions their castle during a boss fight will save you dozens of failed first attempts on the same boss.