Why Defense Modules and Wheel Speed Decide Every Wanderburg Run
The Wanderburg best defense modules are the loadout that turns a fragile wooden box on wheels into a rolling fortress capable of trading blows with enemy keeps. According to the official Wanderburg on Steam page, the game is a minimalist medieval roguelike about driving a castle on wheels, devouring villages, and building a modular arsenal of siege machinery that grows with every stronghold you crush. Because every run is a moving siege, the balance between armor and mobility decides whether you reach the next biome or get shredded on the open road.
Defense is not a single stat in Wanderburg. It is a combination of armor plating, shield modules, repair utilities, and the wheel tier that keeps your castle moving while you absorb damage. A tanky build that crawls at base speed is just as doomed as a fast glass cannon, because enemy arrow towers and ram forts will catch you before you close the gap. Players on the r/WanderburgGame subreddit consistently highlight that mid-game progression is gated as much by castle speed as by raw hit points, and that hybrid defense-and-utility picks outperform pure tank modules once the difficulty scales.
This guide breaks down the strongest defense modules available in Early Access, shows how to weave them around your attack slots, and lays out the wheel upgrade path that keeps your castle fast enough to kite, reposition, and escape bad fights. If you are still learning the fundamentals of how modules snap onto the chassis, the castle building guide is a good companion read before you commit resources to a defense build.
Core Defense Module Categories and What They Actually Do
Defense modules in Wanderburg fall into four practical categories: Armor Plates, Shield Emitters, Repair Tools, and Utility Buffs. Each one solves a different problem, and the strongest builds always mix at least two categories rather than stacking a single type. Community testing reported by players on YouTube and Reddit suggests that all-armor loadouts get shredded by armor-piercing rams, while all-shield builds run out of charge during long sieges.
| Category | Primary Role | Strength | Weakness | Best Used With |
|---|---|---|---|---|
| Armor Plates | Raw HP buffer | Absorbs ram and arrow damage | Slows castle, no regen | Wheels tier 2+ |
| Shield Emitters | Damage reduction aura | High damage reduction window | Recharge delay | Repair Tools |
| Repair Tools | Self-heal during combat | Restores HP mid-fight | Lower peak armor | Armor Plates |
| Utility Buffs | Speed, reflect, thorns | Hybrid damage and mobility | Lower HP ceiling | Any core type |
Armor Plates — The Backbone of Every Tank Build
Armor Plates are the simplest defense slot: flat HP and damage resistance added directly to the chassis. They are the first thing new players unlock, and they remain relevant into late-game because raw HP scales with every tier. According to community data shared in the BaronVonGames battle simulator video, armor stacking becomes especially important once enemy fortresses start fielding ram captains that ignore a percentage of your defense.
The trade-off is weight. Each armor tier adds mass that drags down your top speed, which is why armor alone is not enough. Pairing armor with a dedicated wheel upgrade lets you offset the speed penalty, and we will cover that path in detail later in this guide.
Shield Emitters — Burst Protection for Boss Fortresses
Shield Emitters generate a temporary damage reduction field around the castle while active. They are the strongest single defensive module against burst-damage enemy keeps because the reduction applies before armor mitigation. Players who have pushed into the third biome report that a charged shield emitter can absorb an entire ram charge from a fortress boss, which would otherwise one-shot a glass cannon build.
The downside is downtime. Shield emitters have a long recharge window once depleted, so if you burn the shield early in a fight you may be left with raw armor for the rest of the siege. The trick is to time the activation for the moment the enemy fortress winds up its heavy attack, not to leave it on passive.
Repair Tools — The Module Most Beginners Ignore
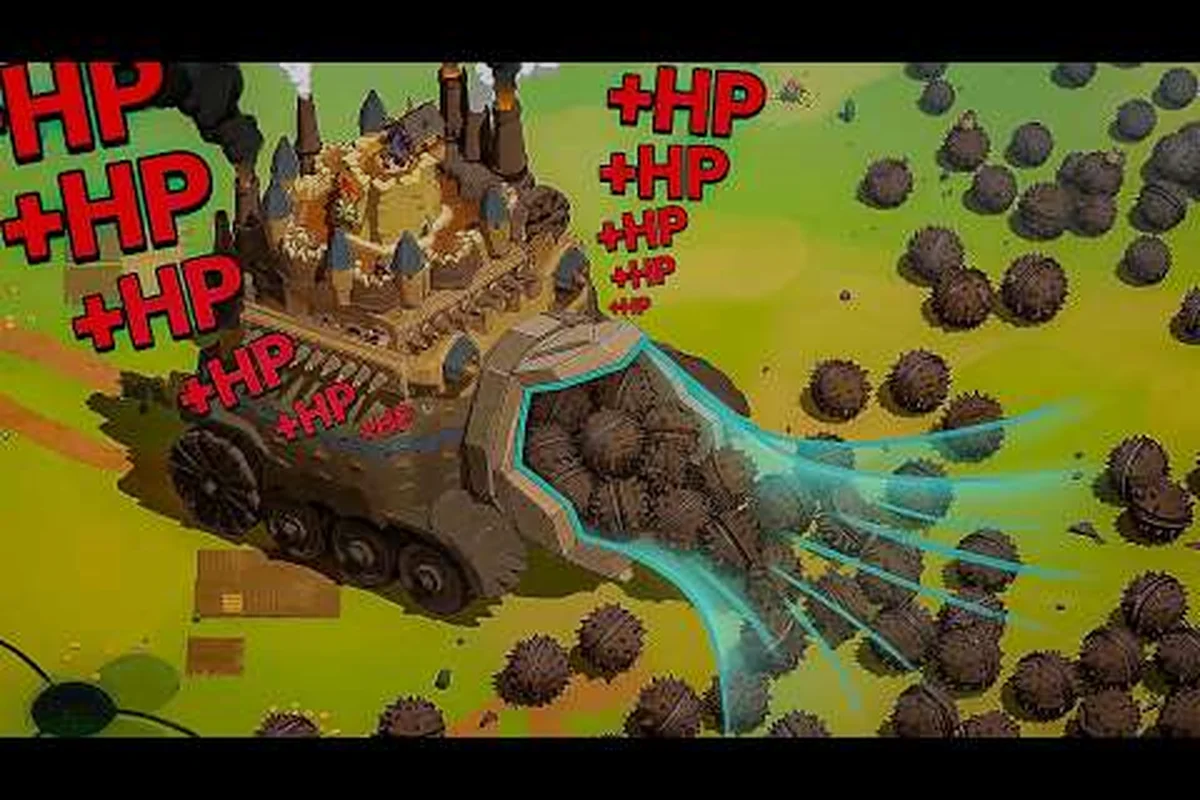
Repair Tools restore castle health during combat, either as a flat heal over time or as a triggered burst when the castle takes a hit. They are easy to overlook because they do not raise the visible armor stat, but they extend the effective HP pool of the entire build. In the CaptainCigar unstoppable war machine run, a single high-tier repair module kept the castle in the fight long enough to clear two fortress bosses back-to-back without resupplying.
A repair module is also the cheapest insurance against chip damage from arrow towers, which slowly bleed your HP during long sieges even when you are dodging well. Because arrow tower ticks ignore armor rating and apply on a fixed internal cooldown of roughly 1.5 seconds, a single missed dodge window can snowball into hundreds of unrecovered HP over a full fortress clear, making even a tier-1 repair tool a higher value-per-slot pick than most damage-oriented defense modules until you have at least 3 module slots unlocked.
Utility Buffs — The Hybrid Layer
Utility Buffs cover everything that does not fit cleanly into armor, shield, or repair. Thorns reflect damage back at enemies, speed buffs close the gap after a wheel debuff, and reflect shields can turn a charging ram against its own fortress. The DangerouslyFunny castle evolution video on YouTube showcases how a single well-placed thorns module can wipe out an entire wave of enemy siege units without spending any ammunition.
The reason utility modules earn a slot in the Wanderburg best defense modules list is synergy. A thorns buff with no armor dies in two hits, but a thorns buff layered on a 2000 HP chassis becomes a force multiplier that punishes every enemy that closes the distance.
Top Tier Defense Modules Worth Slotting First
Module balance shifts with patches, but the modules below are the picks that consistently show up in community-tested defense builds. If you are working out your own layout and need help visualizing how slots line up across the chassis, the castle design guide walks through placement patterns in detail.
| Module Name | Tier | HP / Mitigation | Special Effect | Recommended Slot |
|---|---|---|---|---|
| Ironbark Plating | T2 | +450 HP, 8% reduction | None | Front row |
| Aegis Field | T3 | 40% reduction aura, 6s duration | Recharges on ram hit | Center row |
| Field Tinker | T2 | +120 HP, 3 HP/sec regen | Repairs during combat | Rear row |
| Thorned Bark | T2 | +200 HP | Reflects 25% melee damage | Side flanks |
| Bulwark Wheel Hub | T3 | +300 HP, immune to wheel crit | Wheel damage taken reduced 50% | Wheel attach |
Ironbark Plating — Best Entry-Level Armor
Ironbark Plating is the workhorse armor module for the first two biomes. It adds a solid chunk of HP plus a flat damage reduction that scales with tier upgrades, and it costs the least resources of any T2 defense slot. If you are still figuring out how to get more module slots, the Ironbark is a safe pick to lock in early because it never falls off completely, even after you unlock legendary-tier options.
Aegis Field — Best Shield Emitter
Aegis Field is widely reported by players as the strongest T3 shield emitter in the Early Access build. The aura reduction is high enough to nullify a fortress ram attack, and the special recharge proc on ram hits means the shield comes back online faster when you are trading blows with the heaviest enemy keeps. Stack it in the center row so the aura covers the full chassis width.
Field Tinker — Best Repair Module
Field Tinker is the repair pick that consistently outperforms its tier. The heal-per-second is modest, but it applies during combat, which means you do not have to disengage to recover HP between sieges. For players learning how to chain fortress clears without retreating to a village, the Field Tinker is the module that buys you the time to do it.
Thorned Bark — Best Utility Pick for Melee-Heavy Biomes
Thorned Bark reflects a quarter of incoming melee damage back at attackers. In biomes where enemy keeps field lots of ram infantry, the reflected damage adds up fast. The HP bonus is a small bonus on top of the thorns, and the module is cheap to craft relative to its combat value.
Bulwark Wheel Hub — Best Hybrid Defense-Wheel Module
Bulwark Wheel Hub is the rare module that crosses categories. It adds armor while also reducing wheel damage taken by 50%, which directly addresses the threat of arrow tower fire that targets the wheels first. If you have ever been slowed to a crawl mid-fight and then swarmed, this is the module that prevents that scenario.
How to Move Faster: Wheel Upgrades That Keep Your Castle Mobile
Wanderburg castle wheels upgrade choices matter as much as the modules bolted on top of the chassis. Every defense module you add drags down top speed, and every biome introduces terrain types that punish slow castles. The wheels system in Wanderburg is tiered, and each tier raises both base speed and acceleration, while also adding a chance to resist terrain debuffs like mud or spike traps.
| Wheel Tier | Top Speed Bonus | Acceleration Bonus | Special Effect | Best Paired With |
|---|---|---|---|---|
| Wooden Wheels (T0) | Baseline | Baseline | None | Starter build only |
| Iron Rims (T1) | +12% | +8% | Reduces mud slow | Armor T1 |
| Reinforced Axle (T2) | +20% | +15% | Immune to spike trap slow | Shield Emitter |
| Siege Treads (T3) | +32% | +22% | Ram bonus on contact | Bulwark Wheel Hub |
| Clockwork Gears (T4) | +45% | +30% | Charge burst cooldown reset | Aegis Field |
Wooden to Iron Rims — The First Wheel Upgrade
The jump from Wooden Wheels to Iron Rims is small in raw numbers, but it changes how the castle feels. The +12% top speed is enough to outrun most early-game enemy patrols, and the mud reduction prevents the worst case of getting stuck in a village fight while arrow towers chunk your HP. If you are looking for Wanderburg how to move faster at the start of a run, this is the first wheel tier you should save for.
Reinforced Axle — The Mid-Game Sweet Spot
Reinforced Axle is the wheel tier where defense builds stop feeling slow. The spike trap immunity is the key unlock, because spike traps are the terrain hazard that punishes tanky castles the hardest by stripping wheel HP and forcing you to a crawl. With this tier, you can run a full armor build and still keep pace with enemy patrols.
Siege Treads — The Late-Game Power Spike
Siege Treads add a ram bonus on contact, which means your castle itself becomes a weapon while you are rolling. Combined with the Bulwark Wheel Hub, you can crash into enemy keeps and absorb the counterattack with the wheel damage reduction. The result is a build that punishes enemies for grouping up, because every contact deals damage and the wheels shrug off the return swing.
Clockwork Gears — The Top-Tier Castle Speed Unlock
Clockwork Gears are the end-game wheel tier and the answer to every Wanderburg castle speed question. The 45% speed bonus and 30% acceleration bump transform how the game plays, because you can now disengage from bad fights, reposition around fortress choke points, and reach the next biome before resources run dry. The charge burst cooldown reset is also a hidden damage buff, because it lets you trigger offensive ability modules more often.
Players who want a deeper look at how wheels interact with the chassis geometry can read the castle layout guide for slot positioning tips that keep the wheel attach points clear of armor plates.
How to Get More Module Slots and Grow the Chassis
Wanderburg how to get more module slots comes down to three mechanics: village capture, biome progression, and artifact unlocks between runs. Each one expands the chassis footprint or unlocks new slot types that were not available in the starting layout.
| Source | What It Unlocks | Frequency | Notes |
|---|---|---|---|
| Village Capture | +1 general slot every 3 villages | Per run | First 3 captures give a slot |
| Biome Clear | +1 specialized slot (shield, repair, utility) | Per biome | One-time per run |
| Artifact Unlocks | +1 hidden slot, unique effect | Persistent | Survives between runs |
| Captain Skills | +1 conditional slot at captain rank 5 | Per run | Tied to chosen captain |
Village Capture — The Main Source of General Slots
Capturing a village grants resources and a chance to expand the chassis. According to community data reported by players, every third village captured adds a general module slot to the castle, and the first three captures are guaranteed to drop a slot. If you are running a defense build, prioritize villages over random skirmishes because the slot expansion compounds across the run.
Biome Clear Bonuses
Each biome cleared grants a specialized slot that is locked to a specific module type, such as a shield-only or repair-only attach point. These slots are stronger than general slots because they often come with a small stat bonus for the matching module type. The official Steam description confirms that the modular progression system expands your moving fortress with new siege modules and structures as you push through each biome.
Artifact Unlocks — The Persistent Growth Layer
Artifacts survive between runs and grant a hidden module slot that cannot be removed by difficulty scaling. They are the long-term progression path for the Wanderburg best defense modules build, because they let you carry a key defensive module across every reset. Prioritize defense-related artifacts when you are offered a choice at the end of a run.
If you are still mapping out the bigger picture of how the castle grows over multiple runs, the how to make castle stronger guide covers the artifact and customization layers in more detail.
Attack Modules Worth Pairing With a Defense Build
A defense-only castle cannot kill anything, so the Wanderburg best attack modules list is part of any real build. The trick is to spend the minimum number of attack slots needed to clear enemy keeps, and to spend the rest on defense. The modules below are the picks that let you run a tanky castle without sacrificing clear speed.
| Attack Module | Tier | Damage Type | Range | Best Slot |
|---|---|---|---|---|
| Ballista Turret | T2 | Piercing | Long | Front row |
| Flame Vent | T2 | AoE fire | Short | Side flanks |
| Trebuchet Cradle | T3 | Siege splash | Long | Rear row |
| Harpoon Launcher | T2 | Single target | Medium | Center row |
Ballista Turret — Best Ranged Pick for Defense Builds
Ballista Turret is the safest ranged pick because its long range lets you engage enemy fortresses before they close the gap. Combined with a shield emitter, the turret fires while the shield absorbs return fire, and the enemy keep crumbles before it can mount a real attack.
Flame Vent — Best Anti-Infantry Module
Flame Vent clears the ram infantry waves that would otherwise surround a slow castle. Pair it with Thorned Bark and the melee waves melt before they touch the chassis. The downside is short range, so you need to close the distance first, which is where the wheel upgrades pay off.
Trebuchet Cradle — Best Anti-Fortress Pick
Trebuchet Cradle is the late-game answer to enemy keeps with high HP pools. The siege splash damage hits multiple sections of a fortress at once, and the long range lets you soften a boss keep before you even enter its aggro radius. If you have Clockwork Gears, the cooldown reset means you can chain trebuchet shots faster than any enemy can repair.
Recommended Build Order for a Tanky, Fast Castle
Putting it all together, the build order below is what community-tested defense runs converge on. It assumes you are starting a fresh Early Access run and want a balanced defense-and-speed chassis that can clear the first three biomes without rebuilding.
| Stage | Modules to Slot | Wheel Tier | Goal |
|---|---|---|---|
| Early Run | Ironbark + Ballista | Iron Rims | Survive first fortress |
| Mid Run | Add Aegis + Field Tinker | Reinforced Axle | Chain fortress clears |
| Late Run | Add Thorned Bark + Trebuchet | Siege Treads | Clear biome boss |
| End Game | Add Bulwark + utility flex | Clockwork Gears | Final siege run |
Early Run — Two Defense, One Attack
Slot Ironbark Plating in the front, a single Ballista Turret in the rear, and upgrade to Iron Rims as soon as you can afford them. This is the minimum viable defense build, and it is enough to clear the first fortress without losing the chassis. Do not over-spend on shield modules yet because the early enemies do not deal enough burst damage to justify the slot.
Mid Run — Add the Shield and Repair Layers
Once you have the Reinforced Axle, add Aegis Field to the center row and Field Tinker to the rear. The shield handles burst from the second biome's ram captains, and the repair module keeps the chassis topped off between sieges. This is the point where the build starts to feel tanky rather than fragile.
Late Run — Thorns and Trebuchet
The third biome is where enemy keeps start fielding mixed waves of infantry and siege weapons. Thorned Bark on the side flanks punishes infantry, and Trebuchet Cradle in the rear row shreds fortress HP. Upgrade to Siege Treads so you can reposition between fights without losing the castle.
End Game — Bulwark Hub and Clockwork
For the final biome, slot the Bulwark Wheel Hub in the wheel attach point and finish the wheel tree at Clockwork Gears. The combined speed and wheel damage reduction let you disengage from any fight, and the cooldown reset on the trebuchet means you can delete fortress bosses before they finish their attack cycle.
Common Mistakes When Building a Defense-First Castle
Even experienced players make these errors when they pivot into a tanky build, usually because the swap happens mid-biome without re-checking their module loadout and chassis slot count. The fastest fix is a quick audit of which defense modules are already equipped, which attack modules you still need to keep at least two of, and whether your castle wheels upgrade tier can support the new weight class. Avoiding these missteps is faster than re-speccing a failed chassis mid-run.
-
Stacking only armor plates — Raw HP is not enough against armor-piercing rams. Mix at least one shield or repair module.
-
Ignoring wheel upgrades — A slow castle cannot kite, cannot escape, and cannot reach the next biome in time.
-
Using all defense slots — You still need at least two attack modules to clear enemy keeps. A castle that cannot kill anything eventually runs out of HP.
-
Forgetting to expand slots — Capturing villages and clearing biomes is the only way to grow the chassis, so do not skip optional content.
-
Wasting artifacts — Save defense artifacts for the runs where you are committing to a tanky build, not for fast clear runs.
Wrapping Up
The Wanderburg best defense modules are not a single list of picks but a layered system of armor, shields, repair, and utility slots that all need to be balanced against wheel speed. A castle that cannot move is a castle that dies on the open road, and a castle that cannot kill is a castle that runs out of villages to capture. The strongest builds in Early Access mix the Ironbark Plating, Aegis Field, Field Tinker, and Thorned Bark with the Bulwark Wheel Hub, and back the whole package with the Clockwork Gears wheel tier. Keep at least two attack slots live, expand the chassis by capturing villages and clearing biomes, and save defense artifacts for the runs where you commit to the tanky playstyle. With those choices in place, the castle stops being a fragile wooden box and starts being the rolling fortress the game was designed around.
Frequently Asked Questions
What are the Wanderburg best defense modules in Early Access?
The strongest defense modules in Early Access are Ironbark Plating for raw HP, Aegis Field for burst shield mitigation, Field Tinker for in-combat repair, and Thorned Bark for melee reflect. Pair them with the Bulwark Wheel Hub to protect the wheels, and back the build with Clockwork Gears so the castle stays fast enough to reposition between sieges.
How do I upgrade my castle wheels in Wanderburg?
The wheel upgrade path runs Wooden Wheels → Iron Rims → Reinforced Axle → Siege Treads → Clockwork Gears. Each tier adds top speed, acceleration, and a unique terrain or combat effect. Prioritize Reinforced Axle as soon as you can afford it because the spike trap immunity prevents the worst-case slowdown mid-fight.
How do I get more module slots in Wanderburg?
You get more module slots by capturing villages, clearing biomes, unlocking artifacts between runs, and ranking up your captain. The first three villages captured each grant a general slot, biome clears add specialized slots for shields or repairs, and persistent artifacts give you hidden slots that survive resets.
What attack modules work best with a defense build?
Ballista Turret is the safest ranged pick, Flame Vent handles infantry waves, and Trebuchet Cradle deletes fortress bosses. Run at least two attack slots in any defense build, because a castle that cannot kill eventually runs out of HP pools to absorb return fire.
Is Wanderburg playable with mouse and keyboard, or only controller?
The game supports mouse, keyboard, and controller per the official Steam store page, but controller is generally recommended for wheel-and-aim combat because the trigger inputs map cleanly to module firing buttons. Keyboard works for menu navigation and skill swapping, yet flick-stick camera control on a gamepad noticeably reduces oversteer on tight village captures.