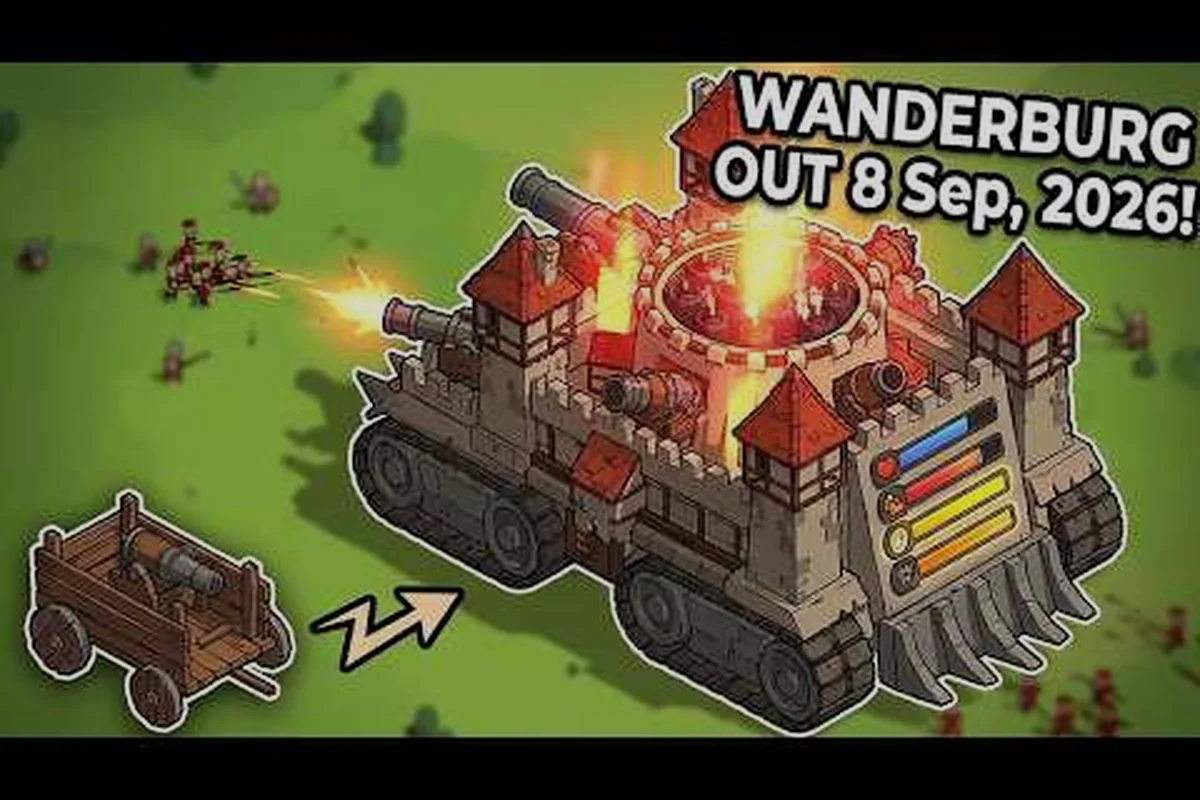
Knowing Wanderburg how to make castle stronger is the single biggest lever between a run that crumbles in Act 2 and one that steamrolls every biome on screen. Your rolling fortress grows almost entirely through the modular progression system, and the difference between a paper-thin starter castle and an unstoppable siege engine comes down to a few well-timed module decisions. Get those right early and every fight, every village devour, and every biome transition becomes easier.
This guide focuses on the practical side of castle growth: which modules to prioritize, how to handle the module capacity system when you outgrow your starting slots, and how to use rearranging and removing modules to swap in better gear without wasting resources. According to the official Wanderburg Steam page, the game is built around "a modular progression system [that] expands your moving fortress with new siege modules and structures," which is exactly the system we'll break down here. If you want a broader overview of build variety first, the Wanderburg castle building guide is a useful companion read.
Understanding the Module System and Castle Strength
Castle strength in Wanderburg is not a single hidden stat — it is the combined output of your hull, your active modules, and how those modules interact with the biomes and enemy types you meet on the road. The Steam store description frames it as "a modular arsenal of siege machinery" that "grow[s] with every stronghold you crush," and community testing on YouTube builds like Gohjoe's "Unstoppable Moving Fortress" run confirms the same pattern: the runs that snowball fastest are the ones that build with intent, not just by stacking whatever the game offers.
These three systems work in a strict dependency chain: a module cannot be mounted before its slot exists on the hull, the capacity budget must not be exceeded or the module refuses to load, and progression unlocks are the only way to graduate past the tier-1 weapons every castle starts with — so every upgrade you pick up between runs should be evaluated against whether it expands, funds, or levels up an existing piece of your build rather than being slapped on as a free bonus.
-
Module slots — the physical grid space on your castle where weapons, armor, and utility pieces are placed. New slots are unlocked as the castle physically expands.
-
Module capacity — the per-slot and total resource budget that limits which modules you can mount at the same time. Heavier weapons and layered armor eat more capacity, so a fully tricked-out castle is rarely possible mid-run.
-
Module progression — the upgrade and unlock trees that let you replace a basic ballista with a higher-tier siege weapon, or swap a wooden bumper for reinforced plating.
The fastest path to a stronger castle is to treat these three systems as a single pipeline. Every village you devour, every boss you defeat, and every artifact you pick up between runs should be evaluated against the question: does this unlock a new slot, raise my capacity, or let me upgrade an existing module?
What "Stronger" Actually Means
In practical terms, a stronger Wanderburg castle performs better in three measurable ways: it survives more hits before its hull breaks, it deals more consistent damage to enemy strongholds, and it moves through biomes without stalling on tougher enemies. Community reports from players like ImCade's "castle that will rule the world" series consistently highlight that a mid-run castle with a few well-chosen modules outperforms a late-run castle with random attachments.
| Strength Signal | How It Shows Up In-Game | Main Driver |
|---|---|---|
| Survives longer fights | Hull bar drains slower, fewer emergency repairs | Armor modules, hull upgrades |
| Wins sieges faster | Enemy stronghold HP drops per hit | Weapon modules, captain buffs |
| Moves through biomes cleanly | Fewer forced stops, more devour opportunities | Wheel upgrades, utility modules |
| Snowballs future runs | More unlock resources per run | Cosmetic & artifact synergies |
The order you push these signals matters. Survivability should come first, because a dead castle earns nothing. Damage output is second, because dead enemies stop damaging you. Mobility and cosmetics are last in terms of raw strength, but they have a real impact on how often you can pick fights, and on how flexible your build becomes later.
Module Capacity: The Real Cap on Castle Power
Module capacity is the resource budget that quietly decides whether your castle can carry that new cannon or whether you have to drop something to make room. Every module you mount consumes part of your total capacity, and the per-slot limit means even an empty grid can refuse a powerful module if the slot itself is too small. This is the most common reason a castle that looks upgraded still feels weak: the modules are mounted, but the capacity math does not work.
According to community testing summarized in early-access player threads, the most efficient early-game capacity pattern is to keep weapon slots full and armor slots at two, then expand armor only after the hull has been reinforced at least once. The exact capacity numbers shift with patches, so treat any specific figure you see as a snapshot rather than a permanent rule, and verify against the official Wanderburg website for the current build.
Capacity vs. Slot Count
It helps to separate two ideas that beginners often blur together. Slot count is how many grid spaces you have — a number that only grows when your castle physically expands. Module capacity is the underlying budget that each module draws from, and that budget is shared across all mounted modules. You can have plenty of empty slots and still be unable to equip a heavy module because the budget is already spent on lighter ones.
| Concept | What It Limits | How It Grows | Common Mistake |
|---|---|---|---|
| Slot count | How many modules you can mount at once | Castle expansions, biome milestones | Saving slots "for later" instead of using them |
| Module capacity | How heavy the modules you mount can be | Artifacts, captain skills, run upgrades | Filling slots with cheap modules that block heavy ones |
| Per-slot limit | Which modules fit a specific grid space | Tier upgrades on the slot itself | Mounting weapons in armor-only slots |
The practical rule: if you find yourself unable to mount a module you just unlocked, look at your capacity, not your slot count. Removing a low-impact module and replacing it with a higher-tier one is almost always the right call, because a single strong module outperforms two mediocre ones.
When to Push Capacity vs. Slots
Pushing capacity makes sense when you already have the modules you want but cannot equip them. Pushing slots makes sense when you have capacity headroom but no room to mount anything new. Most players over-prioritize slots early and then hit a wall when they finally unlock a heavy module they cannot afford. The healthier order is to expand capacity first, then add slots, because the slot without the capacity to fill it is wasted real estate.
How to Remove and Rearrange Modules
Two questions come up almost immediately once players start experimenting: "how to remove modules" without breaking the build, and "how to rearrange modules" so the layout actually matches the new gear. Both are core to Wanderburg castle customization and both are easy to learn once you understand the rules. The official store page calls out "unlockable vehicles, artifacts and captains between runs [that] widen your strategic options," and rearranging is the tool that lets you take advantage of those new options inside a single run.
Removal in Wanderburg is not destructive. Modules you take off go back into your inventory or your storage, and they can be re-equipped in the next biome or in a future run. The cost of a mistake is therefore low, which means you should feel free to experiment — but you should still plan ahead, because every time you remove a module you briefly lose its contribution to your castle's strength.
When to Remove a Module
Removing a module in Wanderburg is a permanent action that frees capacity immediately, so it should only be done when the slot delivers more value than the cost of losing the original attachment. In practice, this means weighing a higher-tier replacement's raw stats, a boss-specific counter, or simply reclaiming space to experiment with a new loadout — each scenario trades away a known working module for an expected upgrade. Think of removal as a deliberate investment in future castle strength rather than a quick rearrangement.
-
A higher-tier replacement has been unlocked and you need the slot or capacity for it.
-
The module is a poor match for the current biome's enemies.
-
You are about to fight a boss whose mechanics punish your current loadout.
-
You want to free capacity to test a new combination.
Rearranging reuses the same module in a different slot without consuming any additional module capacity, so your castle's combat output and stat totals stay completely identical during and after the move. This makes rearranging the safest tool for experimenting with castle customization — for example, shifting a fireball turret to a front-facing slot before re-attempting a boss run, or aligning all cosmetic modules along a wall for a screenshot. Reserve full module removal for when you genuinely need to swap in a higher-tier replacement or reclaim capacity for a new combination.
Rearranging for Real Benefits
Rearranging is not just a cosmetic tool. A well-arranged castle can fire its weapons with better arcs, place armor in the path of incoming fire, and keep utility modules away from the wheels so they do not interfere with movement. Captains and artifacts often have positional preferences, and a quick rearranging pass between biomes is one of the cheapest upgrades in the game.
| Layout Goal | Where to Place the Module | Why It Helps |
|---|---|---|
| Maximize weapon arcs | Edge slots facing the direction you attack from | Wider firing cone, fewer blind angles |
| Tank incoming fire | Front-facing armor slots | Absorbs damage before it reaches the hull |
| Protect wheels | Rear-side utility slots | Keeps mobility modules away from collision zones |
| Group captain synergies | Adjacent slots near the captain's position | Triggers combo effects more reliably |
Treat rearranging as part of your biome-transition checklist. After every village devour and every boss, take ten seconds to look at your grid and ask whether the layout still matches your current plan. Most players who do this consistently report noticeably smoother runs, even when their actual module list has not changed.
Fastest Growth Path: From Starter Castle to Siege Engine
The fastest way to make your Wanderburg castle stronger is to follow a deliberate sequence rather than reacting to whatever the game hands you. The Steam page describes Wanderburg as a roguelike about "devour[ing] entire villages" and "build[ing] your modular arsenal," and the runs that feel like sieges rather than survival stories are the ones that commit to a plan by the end of the first biome.
A clean growth path has three phases, and each phase has a clear priority. Trying to do everything at once is the single most common mistake new captains make, because it spreads resources across too many modules and produces a castle that is mediocre at everything.
| Phase | Goal | Priority Modules | Mistake to Avoid |
|---|---|---|---|
| Early (Biome 1) | Survive and stabilize | 1 strong weapon, 1-2 armor pieces, wheels | Spreading capacity across too many slots |
| Mid (Biomes 2-3) | Snowball damage | Tier-2 weapons, captain buffs, 1 utility | Ignoring slot expansions while chasing damage |
| Late (Biome 4+) | Optimize the build | Synergy artifacts, full armor set, layout pass | Removing core modules to test niche combos |
Notice how armor and survivability come first, then damage, then layout and cosmetics. This is the order that community data consistently points to, and it matches the advice in build videos like CaptainCigar's "Unstoppable War Machine" walkthrough. Once your castle is hard to kill, damage upgrades compound faster because you can take more fights per biome.
Early-Game Priorities
In Biome 1, your only real job is to reach the first castle expansion with your starter build intact. Pick one weapon and stick with it until you have a clear upgrade path. Add armor only when your hull is taking serious damage. Skip cosmetic modules entirely — Wanderburg castle cosmetics are great for personality, but they do not move the strength needle early and they cost capacity you cannot afford to spend.
Mid-Game Power Spike
Biomes 2 and 3 are where most of your permanent growth happens. This is when you should be aggressively using how to remove modules to drop outdated gear, pushing capacity upgrades through artifacts, and unlocking your first captain. If you are unsure how a new module fits into your grid, the Wanderburg castle design guide covers slot placement in more detail. Captains and artifacts are the biggest single power spike in the game, so treat them as a higher priority than any individual module swap.
Late-Game Optimization
By the time you reach the harder biomes, your castle should already be strong enough to win most fights without perfect play. Late-game optimization is about turning "strong enough" into "dominant." Focus on full synergy between your captain, your artifact set, and your weapon loadout. Run a quick layout pass after every boss, and use the Wanderburg castle customization options to specialize your build for the remaining biome's enemy types. This is also when cosmetic modules start to earn their keep, because they provide small but reliable passive bonuses that add up over long fights.
Castle Cosmetics and Customization as Strategic Choices
Wanderburg castle cosmetics and Wanderburg castle customization are often treated as purely visual features, but they have real mechanical effects. Banners, trim pieces, and captain flares can shift how enemy AI prioritizes your modules, and certain cosmetic sets unlock passive bonuses that complement specific weapon archetypes. The official site describes the game as "a minimalist open-world roguelike in an ecosystem of Castles on Wheels," and the cosmetic system is part of what makes each castle feel like its own character rather than a generic rolling box.
Treat cosmetics as a fourth tier of upgrade, after survivability, damage, and layout. Once those three are solid, cosmetic choices become the easiest way to push your build from "strong" to "signature." A captain running a banner set that boosts fire damage, mounted on a castle trimmed in the matching cosmetic theme, will outperform a generic castle with the same raw stats — not because the numbers are better, but because the bonuses and synergies stack cleanly.
| Cosmetic Category | Mechanical Effect | Best Used When |
|---|---|---|
| Banners & trim | Small passive bonuses, AI targeting shifts | After core build is stable |
| Captain flares | Boost captain ability cooldowns or power | When captain is your main damage source |
| Hull skins | Minor resistance to specific damage types | Facing a biome that uses that damage type |
| Wheel cosmetics | Small mobility bonuses, visual clarity | Late-game, when mobility matters most |
The trap to avoid is the reverse: spending capacity on cosmetics before your castle is actually strong. Cosmetics are multipliers, and a multiplier on a small number is still a small number. Lock in your core build first, then layer cosmetics on top.
Frequently Asked Questions
What is the fastest way to make my Wanderburg castle stronger in early runs?
Focus on one strong weapon and one or two armor pieces, then push for your first castle expansion as quickly as possible. The biggest early strength gains come from unlocking new module slots, not from upgrading individual modules. Once you have the slots, prioritize capacity upgrades so you can actually fill them with higher-tier gear.
How does Wanderburg module capacity actually work?
Module capacity is a shared resource budget that all mounted modules draw from. Each module has a capacity cost, and the total cost cannot exceed your current capacity. Capacity grows through artifacts, captain skills, and certain run upgrades, and it is separate from your slot count — having empty slots does not help if your capacity is already spent.
Can I remove modules without losing them permanently?
Yes, removing a module sends it back to your inventory or storage. There is no destruction penalty, so you can experiment freely. The only real cost is the brief moment your castle is missing that module's contribution, so plan removals for safe moments between fights rather than during a boss encounter.
How do I rearrange modules to make my build stronger?
Rearranging is about positioning, not just appearance. Place weapons at the edges of your castle facing the direction you attack from, put armor in slots that intercept incoming fire, and keep utility modules away from the wheels. A clean layout pass after every biome transition is one of the cheapest upgrades you can make.
Are Wanderburg castle cosmetics worth the capacity cost?
Cosmetics are worth it in the late game, once your core build is stable, because they provide stacking passive bonuses. In the early game, they are usually not worth the capacity, since that budget is better spent on armor and weapons. Treat cosmetics as a multiplier on an already strong castle, not as a primary source of strength.